8 Simple Tips for a Greener Home

When you incorporate green practices at home, you use less electricity and water. In addition to reducing your carbon footprint, you’ll reduce your monthly bills, saving you money every month. 

Not all sustainable choices are difficult to implement or impossible to keep up with. In fact, there are many simple ways to go green in your own home, starting today. 

Keep reading for 8 simple ways to make your home more sustainable. 
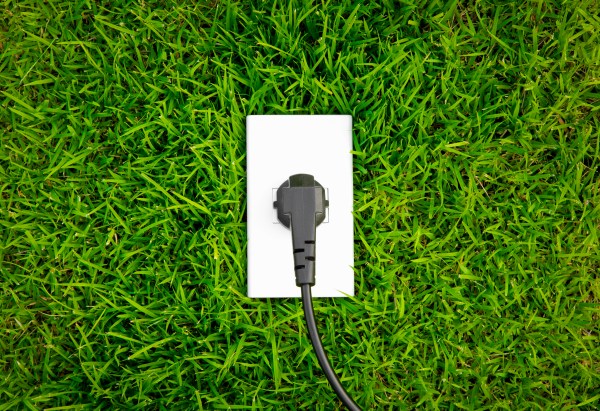
Unplug

One of the easiest ways to save energy is to unplug devices when they are not being used. When you keep appliances plugged in, they continue to suck up electricity even when they are not powered on. Get in the habit of unplugging toasters, heaters, coffee makers, and fans when not in use. You can also use a smart power strip in your home office or entertainment center. These power strips cut power off and save energy when devices are in standby mode. 

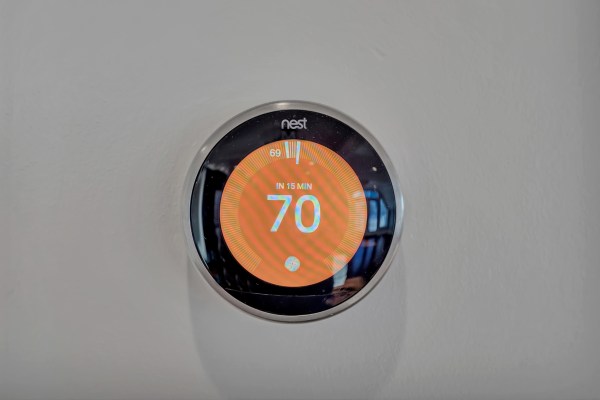
Program Your Thermostat

A programmable thermostat allows you to monitor your heating and cooling systems. This allows you to easily use less energy when you are at work or traveling, and keeps your preferred temperature while you are home.

The Nest Thermostat takes programming to the next level. This ENERGY STAR thermostat learns what temperature you like and builds a schedule for you. It also provides maintenance reminders and HVAC system alerts to keep your system in the best condition. 

Stock Your Freezer

A full freezer works more efficiently than one that is nearly empty. The freezer works harder, and uses more energy, when cooling down air that comes in every time you open the door. If fully stocked, less air is able to enter, which helps to keep the temperature down while saving energy. 

Seal Your Home

Gaps around windows and doors let hot outside air into the house in the summer, and heat escape in the winter. This makes your HVAC system work harder, wasting energy on heating and cooling. Every year, check for gaps throughout your home. When needed, seal the gaps, and use weather stripping around windows and doors to keep inside air in and outside air out. 

Switch to LED Lighting

LED lightbulbs consume about 80% less energy and last up to 20 times longer than incandescent light bulbs. As light bulbs burn out, make sure you replace them with LED lightbulbs for both interior and exterior lights. 

Fix Leaks

Small toilet or faucet leaks often end up on the to-do list, only to be tended to months later. Even small leaks (like a constant dripping) can waste up to 90 gallons of water per day, according to epa.gov. If you notice a leak, call a plumber to assess how it started, and make sure to fix the issue right away. 

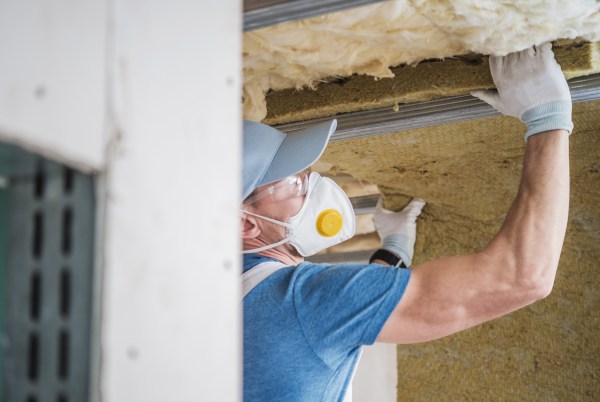
Upgrade Your Insulation

Older homes often lack sufficient insulation. A properly installed home and attic help to keep your home warm in the winter and cool in the summer. This means your HVAC system won’t have to work as hard. 

Purchase Efficient Appliances

When you are replacing appliances, purchase energy-efficient models. You can find ENERGY STAR dishwashers, washing machines, dryers, ovens, and refrigerators. This label verifies that the appliance is energy efficient. In the bathroom, opt for low-flow showerheads and toilets to save water. 

Which of these green tips have you already implemented? Let us know in the comments!

Benefits of Underfloor Heating

Underfloor heating is a popular trend in new construction. Stepping onto a heated floor in winter months adds a feeling of luxury – not to mention warmth. 

Types of Underfloor Heating

There are two main types of underfloor radiant heating: electric (or dry) and water-based (or wet) systems. 

Electric-based systems are comprised of heating cables that are spread on the ground and connected to the thermostat before the flooring is laid on top. These are generally easier and cheaper to install, but are more expensive to run than wet systems. 

Water-based systems are typically connected to the boiler. Continuous plastic pipes are laid out on a subfloor, and the final surface is laid on top. Hot water is pumped through plastic pipes to create heat. Although more difficult to install, wet systems are more cost-effective over time. 

Regardless if you choose electric or water-based underfloor heating, they both provide benefits over traditional heating systems. Keep reading to learn what they are!

Energy Efficient

Underfloor heating saves energy compared to forced-air or radiator heat. When air is delivered from above, fan power is required to push the hot air down. In addition, more heat is needed to compensate for uneven heating throughout the room. These factors lead to more energy being used and a higher energy bill. 

Underfloor heating starts at ground level, distributing warm air using natural convection. This means less energy is used. Water-based systems use even less energy than electric underfloor systems, because heating water with a boiler uses less energy than heating with electric radiant cables. 

Improved Comfort

One of the main benefits of underfloor heating is it eliminates cold spots. Traditional heating systems can make a room feel too warm, followed by a period of being too cold. There might also be cold spots or drafts, depending on where the heat is coming from.

With underfloor systems, heat is evenly distributed, rising up from the floor. These systems are both silent and efficient, creating the perfect temperature and added comfort for all. 

Improved Air Quality

Forced airflow can have a negative impact on air quality, as it spreads dust, particles, and pathogens. In addition, forced air systems require a higher heat output due to uneven heat distribution. This dries the air, causing dust and pollutant particles to stay airborne longer, plus added irritation to eyes, skin, and respiratory system. Underfloor heating reduces air movement and even distributes heat, which helps to improve air quality. 

In new construction, underfloor heating is often a requested feature, for both comfort and efficiency. What room in your home would you most love to have underfloor heating?

Solar Roof Panels vs. Solar Shingles

As solar roof technology becomes more advanced, homeowners have more options when making the switch to solar energy. 

Solar roofs are enticing because they harness the sun’s solar energy to generate electricity for the home, potentially saving money and energy. While solar panels have become a common sight in neighborhoods across the country, solar shingles are also becoming more mainstream. 

What is the better option for your home? Below, we compare solar panels and shingles to help with the decision. 

Solar Roof Panels

Solar panels are large panels that are installed on top of the shingles on the roof. Several panels are installed on the roof, generating electricity that can be used by the household. 

Pros of Solar Roof Panels

  • Solar panels maximize electricity production. 
  • Solar panels can be angled to gather sunlight. Some types of panels can swivel and adjust throughout the day.
  • Solar panels can be placed on your property, as well as the roof.  
  • You can have the panels removed and bring them with you to a new house.

Cons of Solar Roof Panels

  • Panels appear bulky. 
  • The installation of solar panels involves many steps and requires electrical inspections.

Solar Shingles

Solar shingles are a more recent technology than solar panels and are designed to look to typical roof shingles. Solar shingles have two functions: to protect the roof and to generate electricity. 

Pros of Solar Shingles

  • Solar singles are more aesthetically appealing, blending in with other shingles of the roof. 
  • Solar shingles can double as shingles, so if replacing the entire roof, it can be cost-effective.
  • Solar shingles are easier to install than panels. 

Cons of Solar Shingles

  • Solar shingles are less energy efficient than solar panels.
  • The roof needs a particular slope with ample sunlight exposure.
  • The lifespan of solar shingles is less than panels. 
  • Removing solar shingles is not an option because they serve as the roof shingles.

Solar energy can save money and energy over time. When making the switch to solar energy, always consult a professional to determine what your options are. 

4 Benefits to Nest Thermostats

Smart and green.

More and more aspects of the home are becoming advanced. Smart appliances coupled with sustainable products allow homeowners to increase efficiency, decrease energy usage, and save money. 

Thermostats and heating systems are a major player in the home’s energy usage and costs. Nest Thermostats take the guesswork out of saving energy, making it the first thermostat to become ENERGY STAR certified by the Environmental Protection Agency. Here’s why we decided to install Nest Thermostats in all the units at the Residences at 66 High Street

No Programming Required

Programmable thermostats help you become more efficient with energy and save money. The problem is they can be complicated to figure out, and only allow for 2-3 changes throughout the day.

Nest Thermostats learn your schedule, your preferences, changes in the season, and even your home’s heating and cooling system. After a few days, the thermostat knows when to turn the temperature up or down. Once it learns your preferences, you don’t have to make any adjustments. The best part? You start seeing your monetary savings right away. 

Control from Anywhere

Let’s say you are off of your typical schedule – you are working late, or are getting home earlier than expected. You have the ability to control the temperature from your phone. This ensures energy savings when the house is empty and comfortable temperatures when you arrive home. 

Proven to Save Energy

Heating and cooling a house account for nearly 50% of all energy usage. Studies have shown that Nest Thermostats saves homeowners 10%-12% on heating and 15% on cooling. In addition, an Eco Temperature setting takes over when Nest Thermostat senses you are away for an extended time. This helps save even more, without the hassle of changing the programming. 

Nest Leaf 

The Nest Leaf collects and analyzes data from your home. Based on that data, Nest offers ways for you to save even more energy. A Green Leaf that appears on the thermostat is your signal – simply press it to learn about ways you can save. 

This type of technology is the future of the Smart Home: saving energy and money, without the need to program. 

Do you have a Nest Thermostat? Tell us about your experience with it!


10 Tips to Stay Warm at Home this Winter

Winter weather means spending more time cozied up inside. Staying warm during the coldest season of the year doesn’t have to equate to sky-high heating costs. With some preparation, you and your budget can stay comfortable all year long. 

Incorporate some (or all) of these tips for added warmth this winter.

Programmable Thermostat 

A programmable thermostat, like Nest, makes your heating more efficient. Set your thermostat to a comfortable setting for times you will be home.  Lower the temperature during times the house is empty or when everyone is asleep. An automatic schedule ensures the heat doesn’t stay on high all day long and keeps the house toasty when people are there. 

Let in the Light

Window curtains can do more than give privacy. During the day, when the sun is shining, open the drapes. Even with cold temperatures, the sun’s light is warm. Once the sun goes down, close the curtains to prevent heat from escaping through the windows. You can even purchase insulated curtains for winter use. 

Check the Furnace

Make sure your furnace is in good working order with a simple tune-up. Also, check the furnace filter. If it is dirty, replace it with a new filter to maximize the efficiency of the furnace. 

Seal Gaps and Leaks 

Doors, windows, attics, and basements can have leaks, letting the cold air in during the winter. Finding and sealing these leaks is a simple solution to retaining heat. This do-it-yourself guide from energystar.gov provides more information on how to seal leaks. You can also use draft stoppers for doors where you feel cold air sneaking in. 

Check Vents and Radiators

Vents and radiators that are blocked will produce heat that is blocked. Move furniture away from vents and heaters so that warm air can blow into the room being heated.  

Rugs on Hardwood

Bare hardwood floors can account for heat loss. Grab some area rugs for extra warmth in the rooms you utilize most. 

Reverse Ceiling Fans

We all know that warm air rises, but did you know your ceiling fan can push that warm air back down? The trick is to reverse the motion of the blades, so the fan moves clockwise. 

Radiant Floors

If you want to go a step up from area rugs, radiant floors are the way to go. While more expensive than carpet, radiant heating systems evenly distribute heat that slowly rises to the rest of the room. 

Insulation

Poor insulation equals a loss of heat and a loss of money during the winter months. Check to make sure you have proper insulation. This will help to keep you warm while keeping energy costs low. 

HVAC Zoning System

An HVAC zoning system allows each area of the home to stay at a different temperature. You can keep the most-used rooms warm while lowering the temperature in rooms that are rarely used. 

Living in a region with cold winters means you can appreciate the beauty of the season. It also means you need to prepare your home for the changing temperatures. 

How do you stay warm in winter?


What type of insulation do I need?

Insulation is needed in homes for many reasons: cost and energy savings, comfort, and even noise reduction. Depending on the climate where you live, the amount or type of insulation you need varies.

Insulation materials slow the flow of heat. In winter, it will slow the flow of heat from inside the home moving out, and in summer it slows the flow of heat from the outside in. The better insulation you have, the slower that flow will be, saving you on heating and cooling costs.

Insulation R-values refers to how much insulating power you need or have in your home. The higher the R-value, the more heat the material resists. The R-value is determined by the type of material used, the density, and the thickness.

The map and table below, from Insulation Institute, shows the insulation R-value needed based on location in the United States.

Zone Attic Wall Cavity Floor
1 R30 to R49 R13 to R15 R13
2 R30 to R60 R13 to R15 R13 to R25
3 R30 to R60 R13 to R15 R25
4 R38 to R60 R13 to R15 R25 to R30
5 R38 to R60 R13 to R21 R25 to R30
6 R49 to R60 R13 to R21 R25 to R30
7 R49 to R60 R13 to R21 R25 to R30
8 R49 to R60 R13 to R21 R25 to R30


“This map shows thermal recommended levels of insulation for various climate zones, based on recommendations from the U.S. Department of Energy (DOE) and the International Energy Conservation Code (IECC). The IECC is the model building code for the United States.” (insulationinstitute.org)

When building or renovating, consult with your contractor to determine what type of insulation is best for your home and location.

Website Built with WordPress.com.

Up ↑